What is Data Lineage?
Wikipedia's describes data lineage as:


UPDATE: development on the Neo4j support in Pentaho Data Integration has stopped and the code repository has been archived. Improved versions for the plugins discussed in this post are available in Apache Hop. Check the Hop equivalent of this page for more up-to-date information. Additionally, find out how you can breathe new life into your Pentaho projects by upgrading to Apache Hop.
Whether you’re a seasoned Neo4j developer or analyst, or are just getting your feet wet with Neo4j, one of your biggest annoyances probably is that you spend way too much time loading data to your graphs. Of course you can create and import CSV files, but that process quickly becomes tedious and time consuming. We thought there had to be a better way.
As huge fans of both Kettle (or Pentaho Data Integration) and Neo4j, we decided to bring the two together and started the development of a Kettle plugin to load data to Neo4j back in 2017. A lot has happened since then. Kettle founder Matt Casters joined Neo4j and took over the development of the plugin, added a number of additional steps and overall improvements and turned it into a tool that is ready for production. Let's have a closer look.
We’ll assume you’re familiar with getting both Neo4j and Kettle up and running. If you’re not, check here to find out how to get started with Kettle and here to get started with Neo4j or check our Graph Page for more information about graphs in general.
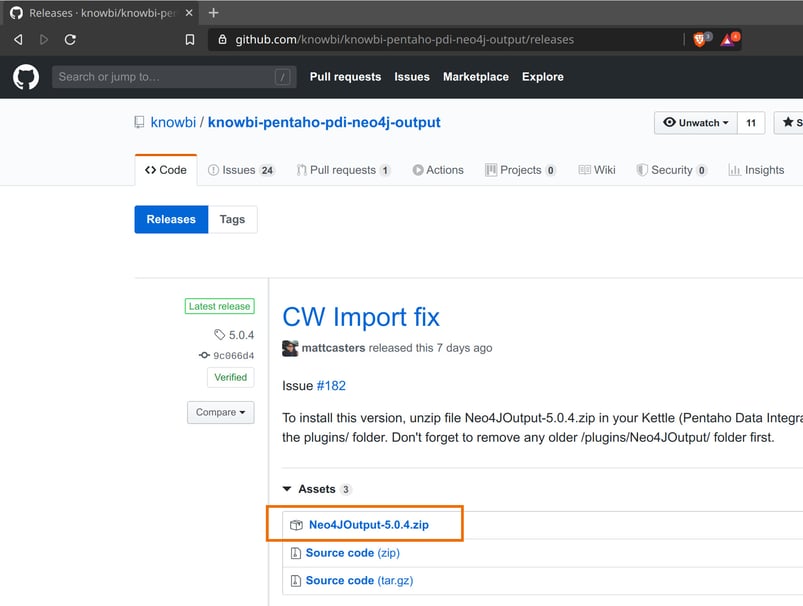
To install the Neo4j plugin in your Kettle installation, download the latest release (currently 5.0.4) from our GitHub repository, unzip it to your data-integration/plugins folder (don't forget to remove older versions first) and restart Spoon. An alternative to manual plugin installation is to go to remix.kettle.be and download Kettle Remix, Matt's Kettle distribution that contains lots of bug fixes and functionality that is not available in the default Kettle download. The Neo4j plugin is part of this additional functionality.
2020-05-20: in our original post, the only step we implemented was the Neo4j Output. Matt extended the functionality and implemented additional steps that were added to this post.
After Spoon restarts, you'll have a new 'Neo4j' category in your transformation editor:
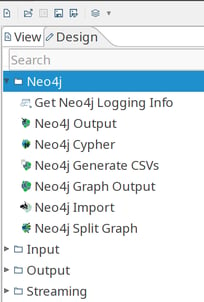
The available transformation steps are:
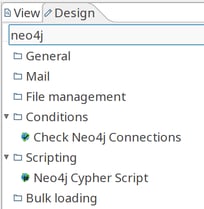
The available job entries are:
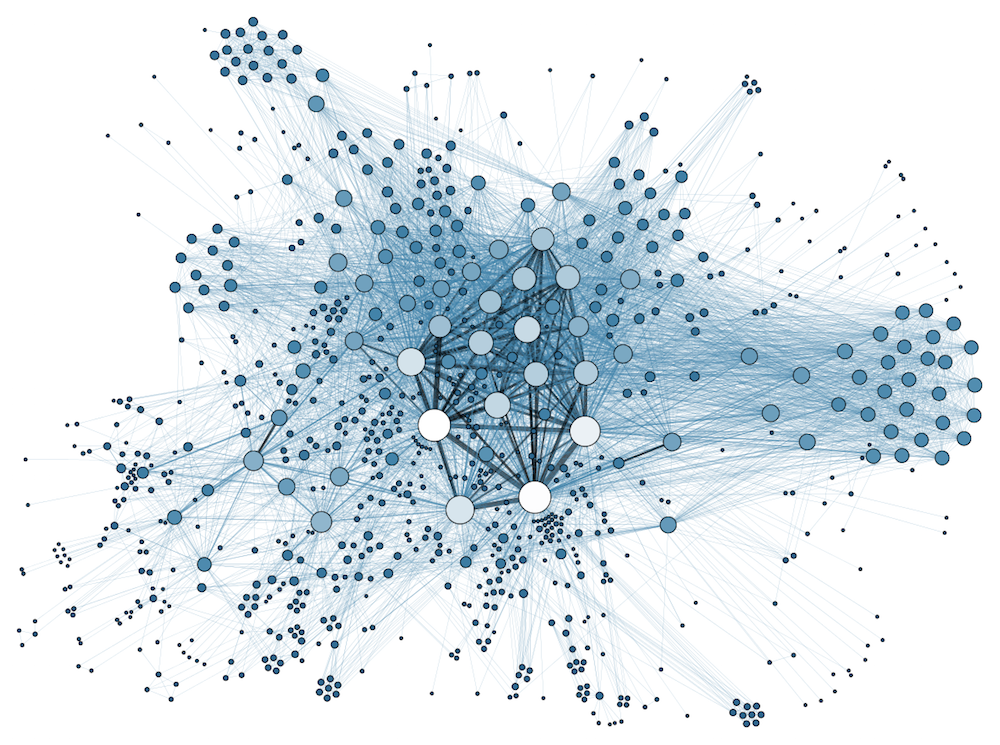
Graphs are everywhere, and so is Belgian beer, so we didn't have to look hard for a sample graph to create through the plugin: we’ve recreated Neo4J rock star Rik Van Bruggen’s Beer Graph demo with the Neo4J Output step to show you how easy creating nodes and relationships can be. Get the ETL to create this sample graph here.
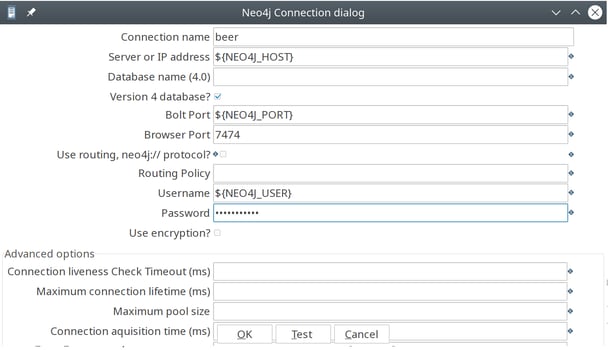
Enter the connections details for your Neo4j server through Neo4j -> Edit Connection (Remix) or from the connection fields in one of the Neo4j Output steps in the nodes transformations (see below). To parameterize these connections, you'll need to add key/value pairs to your kettle.properties, for example:
NEO4J_HOST=localhost
NEO4J_USER=neo4j
NEO4J_PASS=knowbi
NEO4J_PORT=7687 # the BOLT protocol port (default 7687), not the browser port (default 7474)
The sample (jb_beer_graph.kjb) job consists of two transformations:
tr_beer_nodes.ktr: read the provided csv file, split for alchohol, brewery, type, brand and create nodes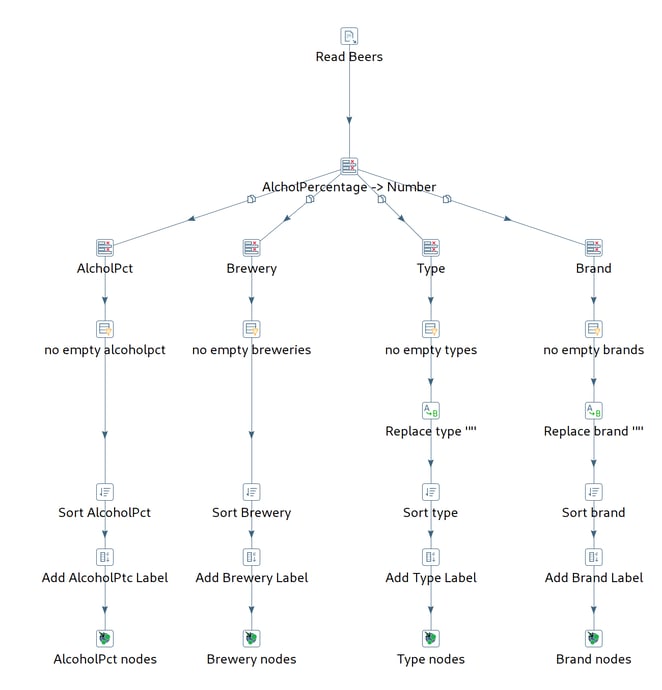
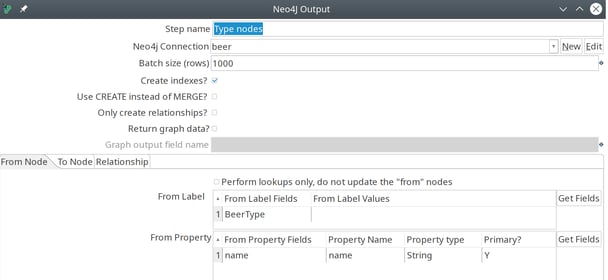
To create the nodes, the Neo4j Output has the following options:
In this case, we use the BeerType field to create a label and the name field for the beer type as the 'name' property. The 'Primary?' flag is set to 'Y' to indicate this is this node's primary propery which will be required to lookup this node when relationships are created.
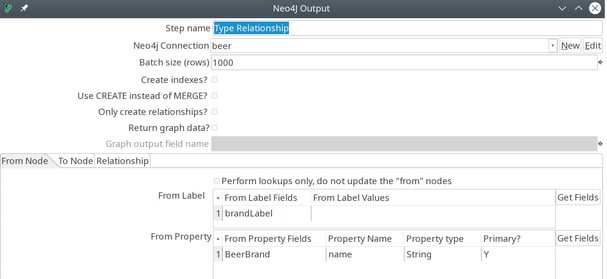
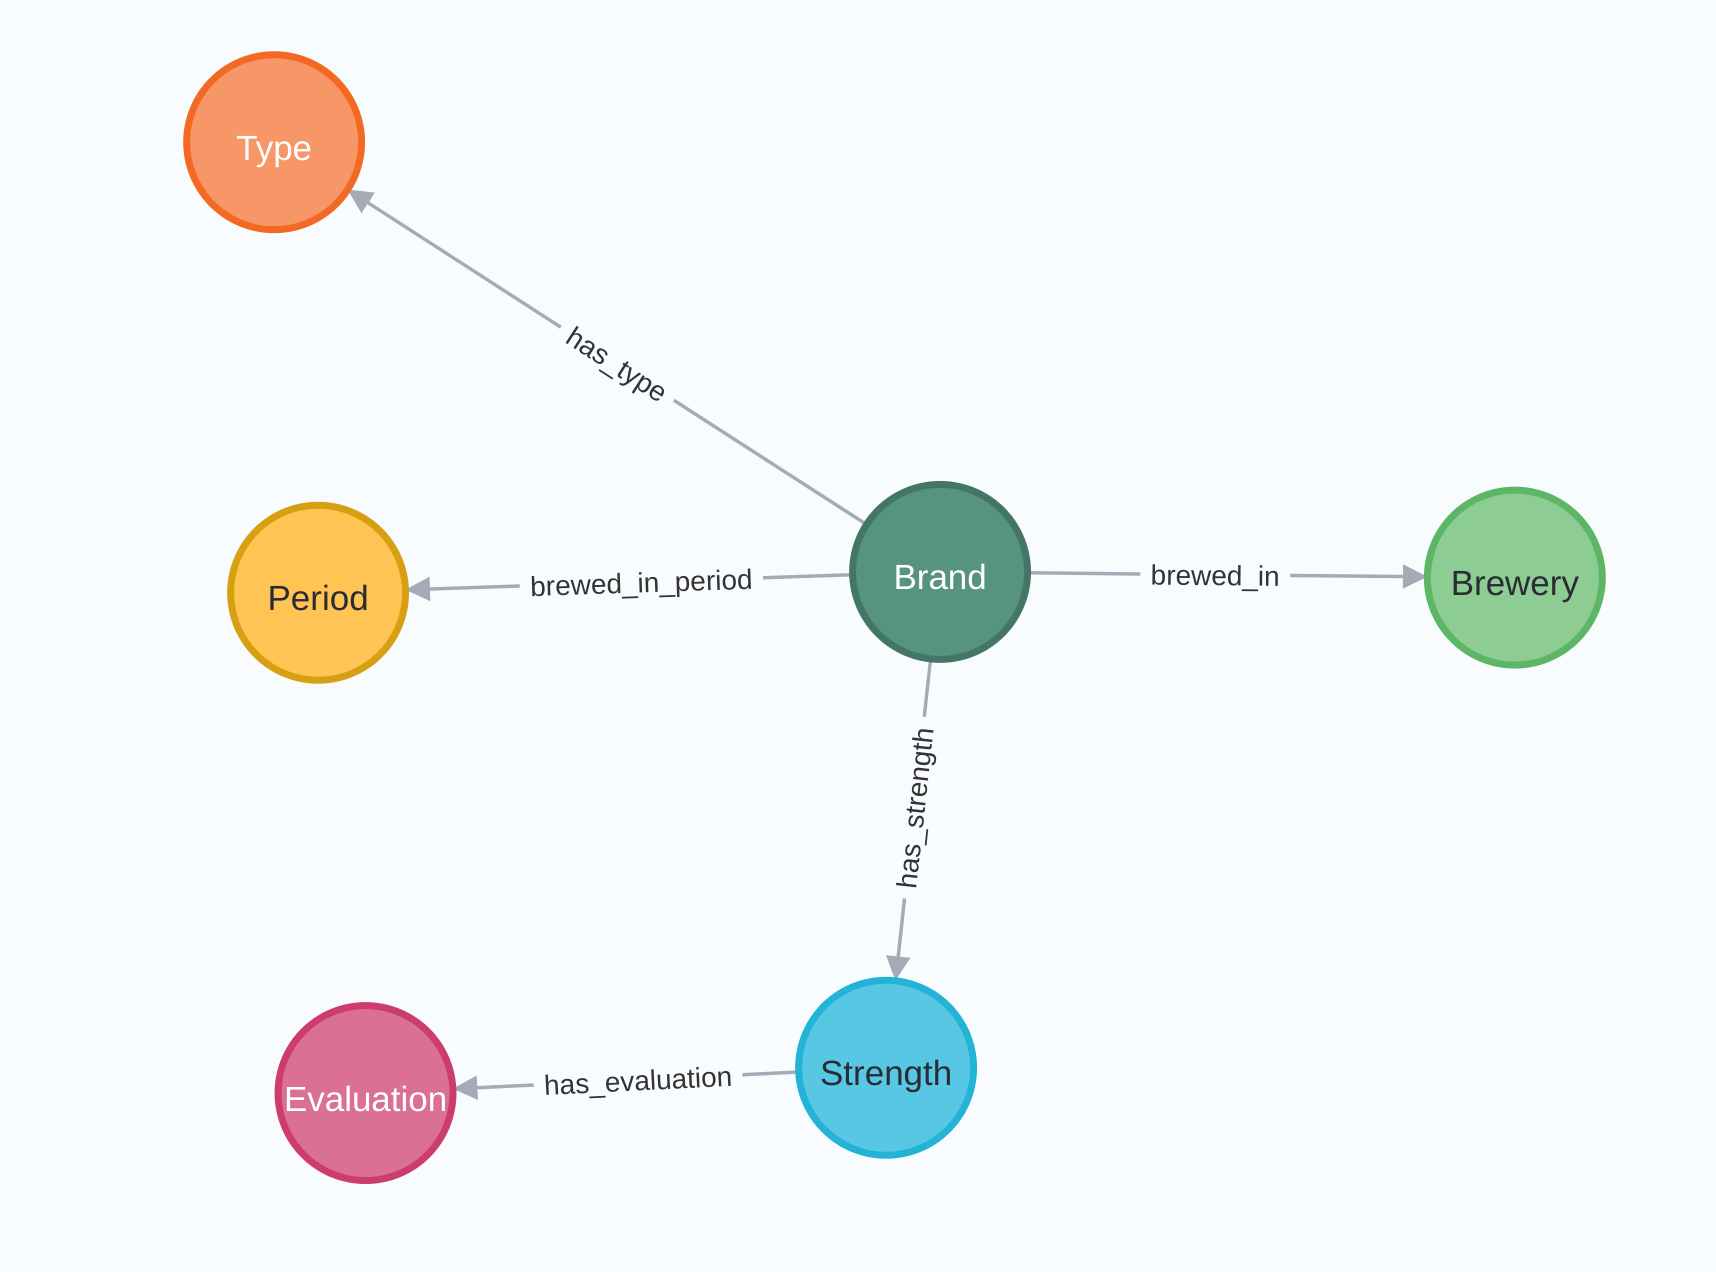
The transformation to create the relationships is very similar. Instead of creating four separate streams for the nodes, we split the provided CSV files into three streams for the relationships: beer - alcholpct, beer - brewery, beer - type, brand - beer.
The Neo4j Output step offers three tabs to create relationships.
First, in the 'From Node' tab the node label field (brandLabel field) and primary property (BeerBrand) is specified.
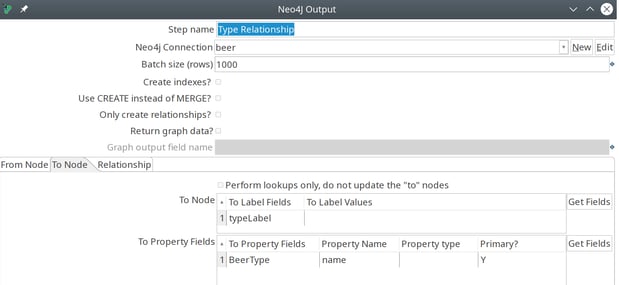
The lookup for the end node is very similar:
Finally, we specify the relationship to connect these nodes from the Relationship tab:
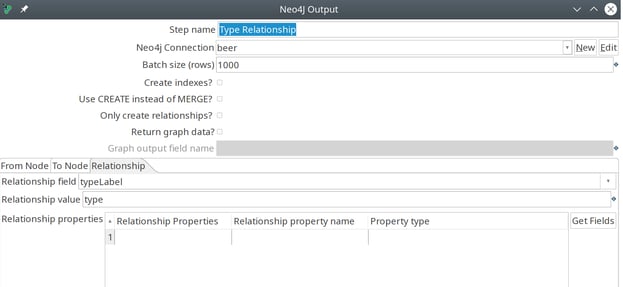
In this tab, we specify the relationship to create from either a field or a hard coded value.
The beer graph is created in two separate transformations (first nodes, then relationships) to ensure no node duplicates are created because of transaction overlaps. In general, creating nodes in a first run and relationships in a second will improve performance.
After running the job, the graph can be queried from the Neo4J browser (e.g. http://localhost:7474).
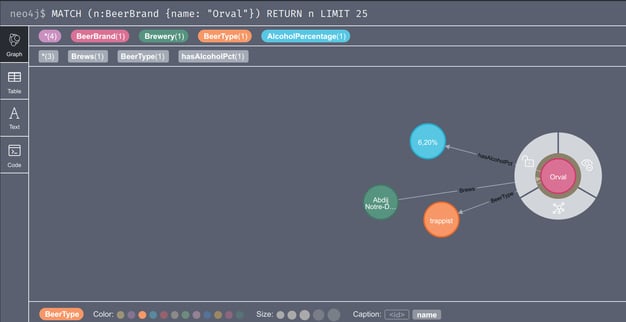
This query will return the node for the delicious Orval beer. If you're not yet familiar with Cypher, double clicking on the selected Orval node will show you the related nodes for brewery, beer type and alcohol percentage.
More information on how to use these steps can be found in the github wiki.
Update 2020-05-20: a lot has happened since we wrote the initial version of the Kettle Neo4j plugin and this post. First of all, Neo4j has grown a lot in the past 2.5 years, as has the functionality provided by the Kettle Neo4j plugins.
Since we didn't see the same growth for Pentaho Data Integration (aka Kettle), we've started Project Hop. All of the functionality in the Kettle Neo4j plugins already is available in Project Hop. To find out more about what Project Hop is and to learn how and why know.bi is heavily involved, check out this post.

Wikipedia's describes data lineage as:

Neo4j is the world's leading graph database management system, designed for optimized fast...
Neo4j is the world's leading graph database management system, designed for optimized fast...

Blog comments