

MongoDB
MongoDB
MongoDB is a document-oriented database that stores data in JSON-like documents with a dynamic schema. It means you can store your records without worrying about the data structure such as the number of fields or types of fields to store values.
Apache Hop is a data engineering and data orchestration platform that is currently incubating at the Apache Software Foundation. Hop allows data engineers and data developers to visually design workflows and data pipelines to build powerful solutions.
With the following example, you will learn how to write data to a MongoDB database using Apache Hop.
As always, the examples here use a Hop project with environment variables to separate code and configuration in your Hop projects.
Step 1: Create a MongoDB connection
The MongoDB connection, specified on a project level, can be reused across multiple pipelines and transforms.
To create a MongoDB Connection click on the New -> MongoDB Connection option or click on the Metadata -> MongoDB Connection option. The system displays the New MongoDB Connection view with the following fields to be configured.
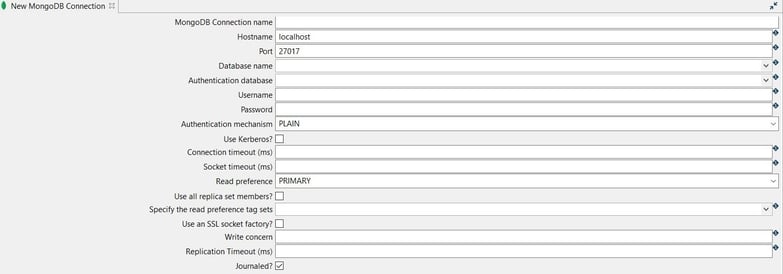
The connection can be configured as in the following example:
- MongoDB Connection name: the name of the metadata object (mongodb-connection).
- Hostname: the name of the host (${MONGODB_SERVER} = localhost).
- Port: the port number (${MONGODB_PORT} = 27017).
- Database name: the name of the database (${MONGODB_DATABASE} = how-to).
Test the connection by clicking on the Test button.
Step 2: Add and config a CSV file input transform
The CSV file input transform allows you to read data from a delimited file.
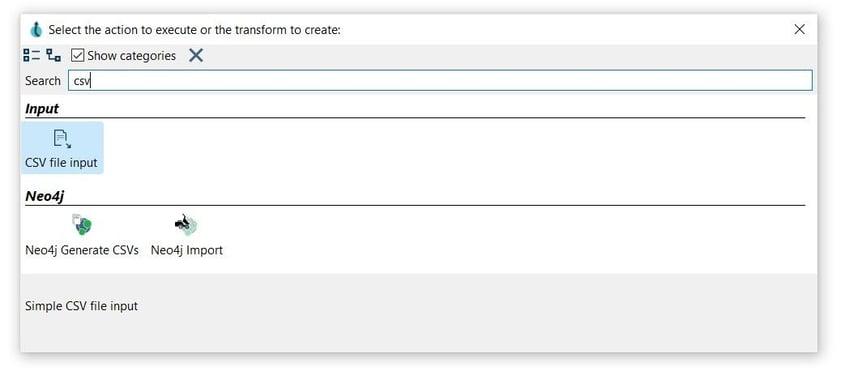
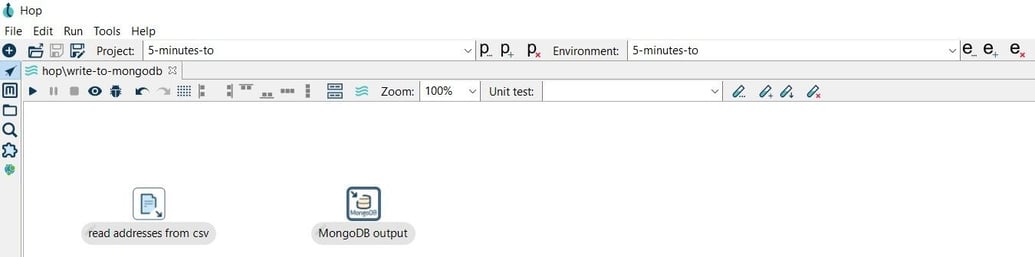
After creating your pipeline (write-to-mongodb) add a CSV file input transform. Click anywhere in the pipeline canvas, then Search 'csv' -> CSV file input.
Now it’s time to configure the CSV file input transform. Open the transform and set your values as in the following example:
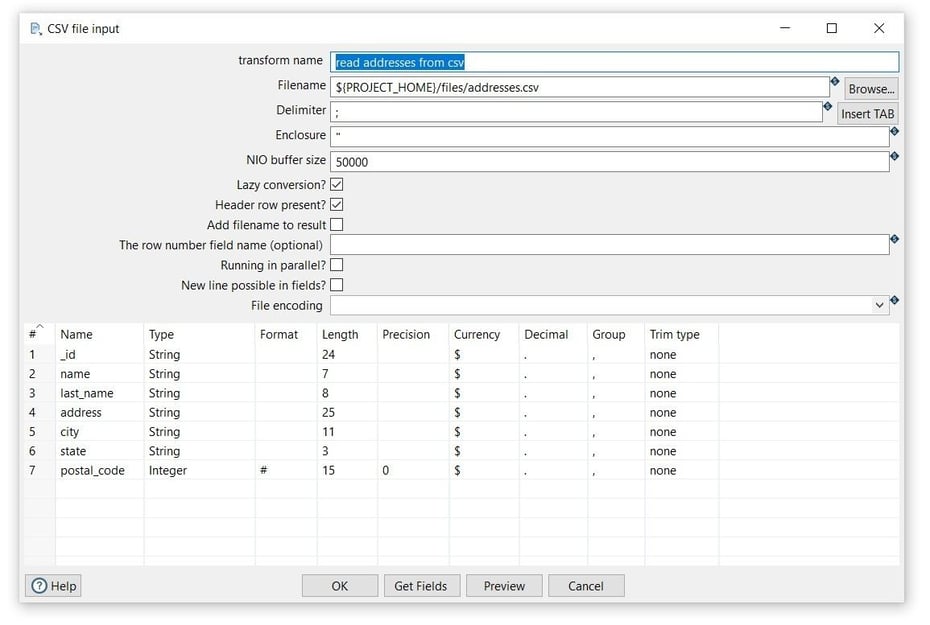
- Transform name: choose a name for your transform, just remember that the name of the transform should be unique in your pipeline (read addresses from csv).
- Filename: specify the filename and location of the output text file. You can use the PROJECT_HOME variable and add the folder and file name (${PROJECT_HOME}/files/addresses.csv).
- Click on the Get Fields button to get the fields from the CSV file and click on the OK button twice to get the fields.
- Click OK to save
Step 3: Add and config a MongoDB output transform
The MongoDB output pipeline transform can output data to a MongoDB database collection. Add a MongoDB output transform to your pipeline.
Now it’s time to configure the MongoDB input transform. Open the transform and set your values as in the following example:
Tab: Output options
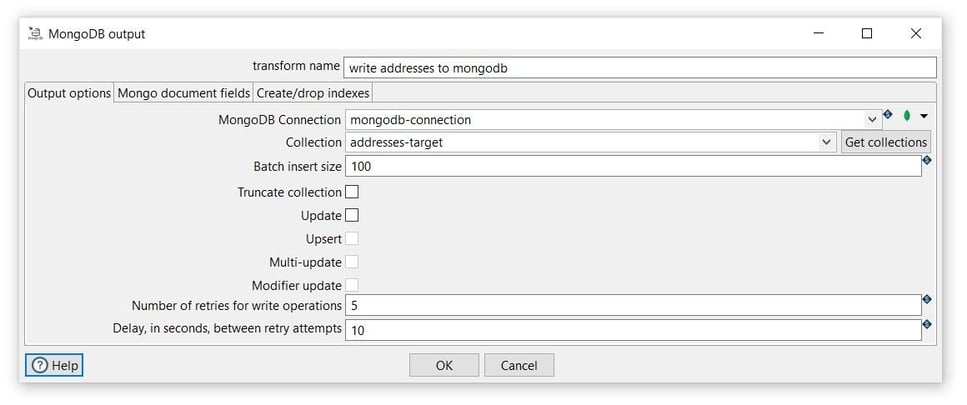
- Transform name: choose a name for your transform, just remember that the name of the transform should be unique in your pipeline (write addresses to mongodb).
- MongoDB Connection: select the created connection (source-connection).
- Collection: click on the Get collection to see the available collections or insert the collection name (addresses-target).
Tab: Mongo document fields
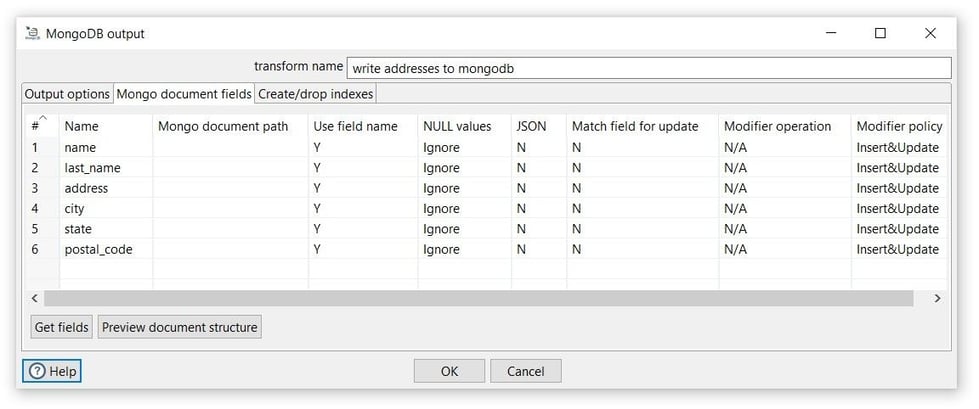
- Click on the Get fields to get the collection fields.
Note that the _id field is not used in this case, will be generated in the MongoDB collection.
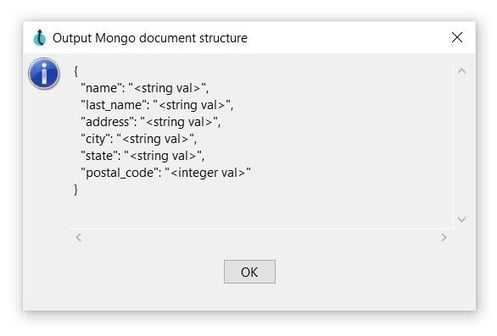
- You can use the Preview document structure option to open a dialog showing the structure that will be written to MongoDB in JSON format.
- Click on the Close and OK options to save the configuration.
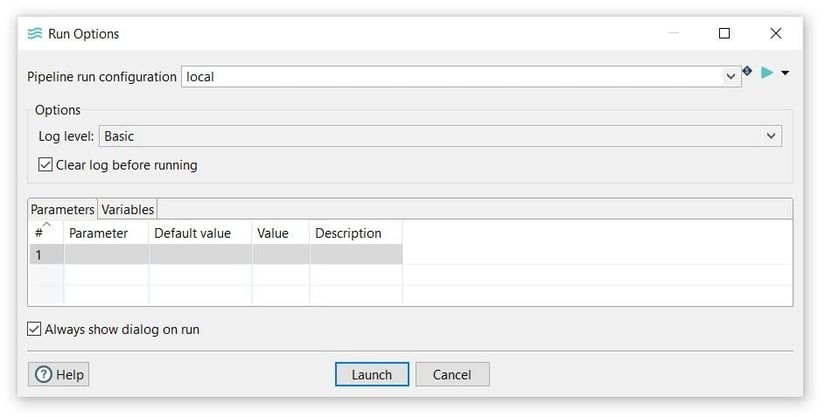
Step 4: Run your pipeline
Finally, run your pipeline by clicking on the Run -> Launch option:
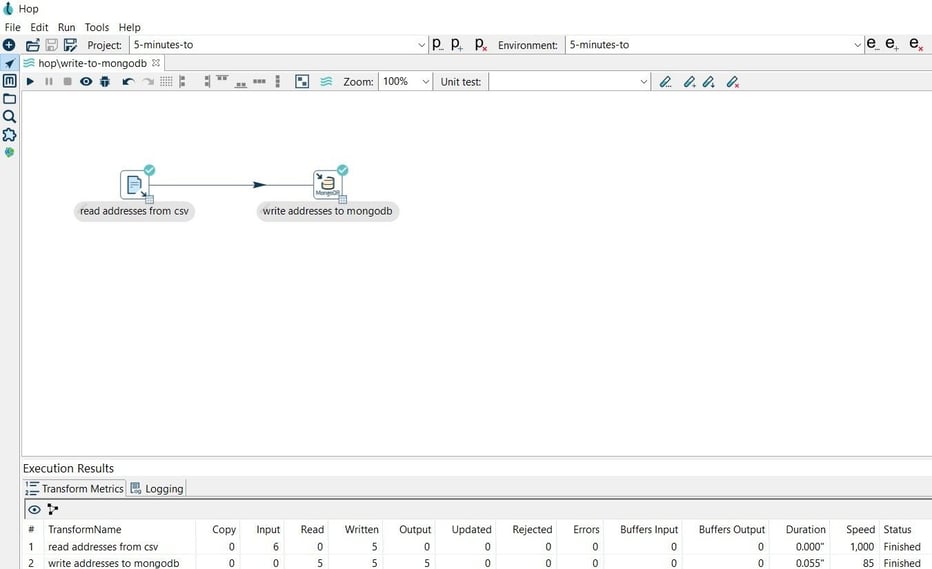
Verify the loaded data in your MongoDB database.

You can find the samples in 5-minutes-to github repository.
Want to find out more? Download our free Hop fact sheet now!


Blog comments