

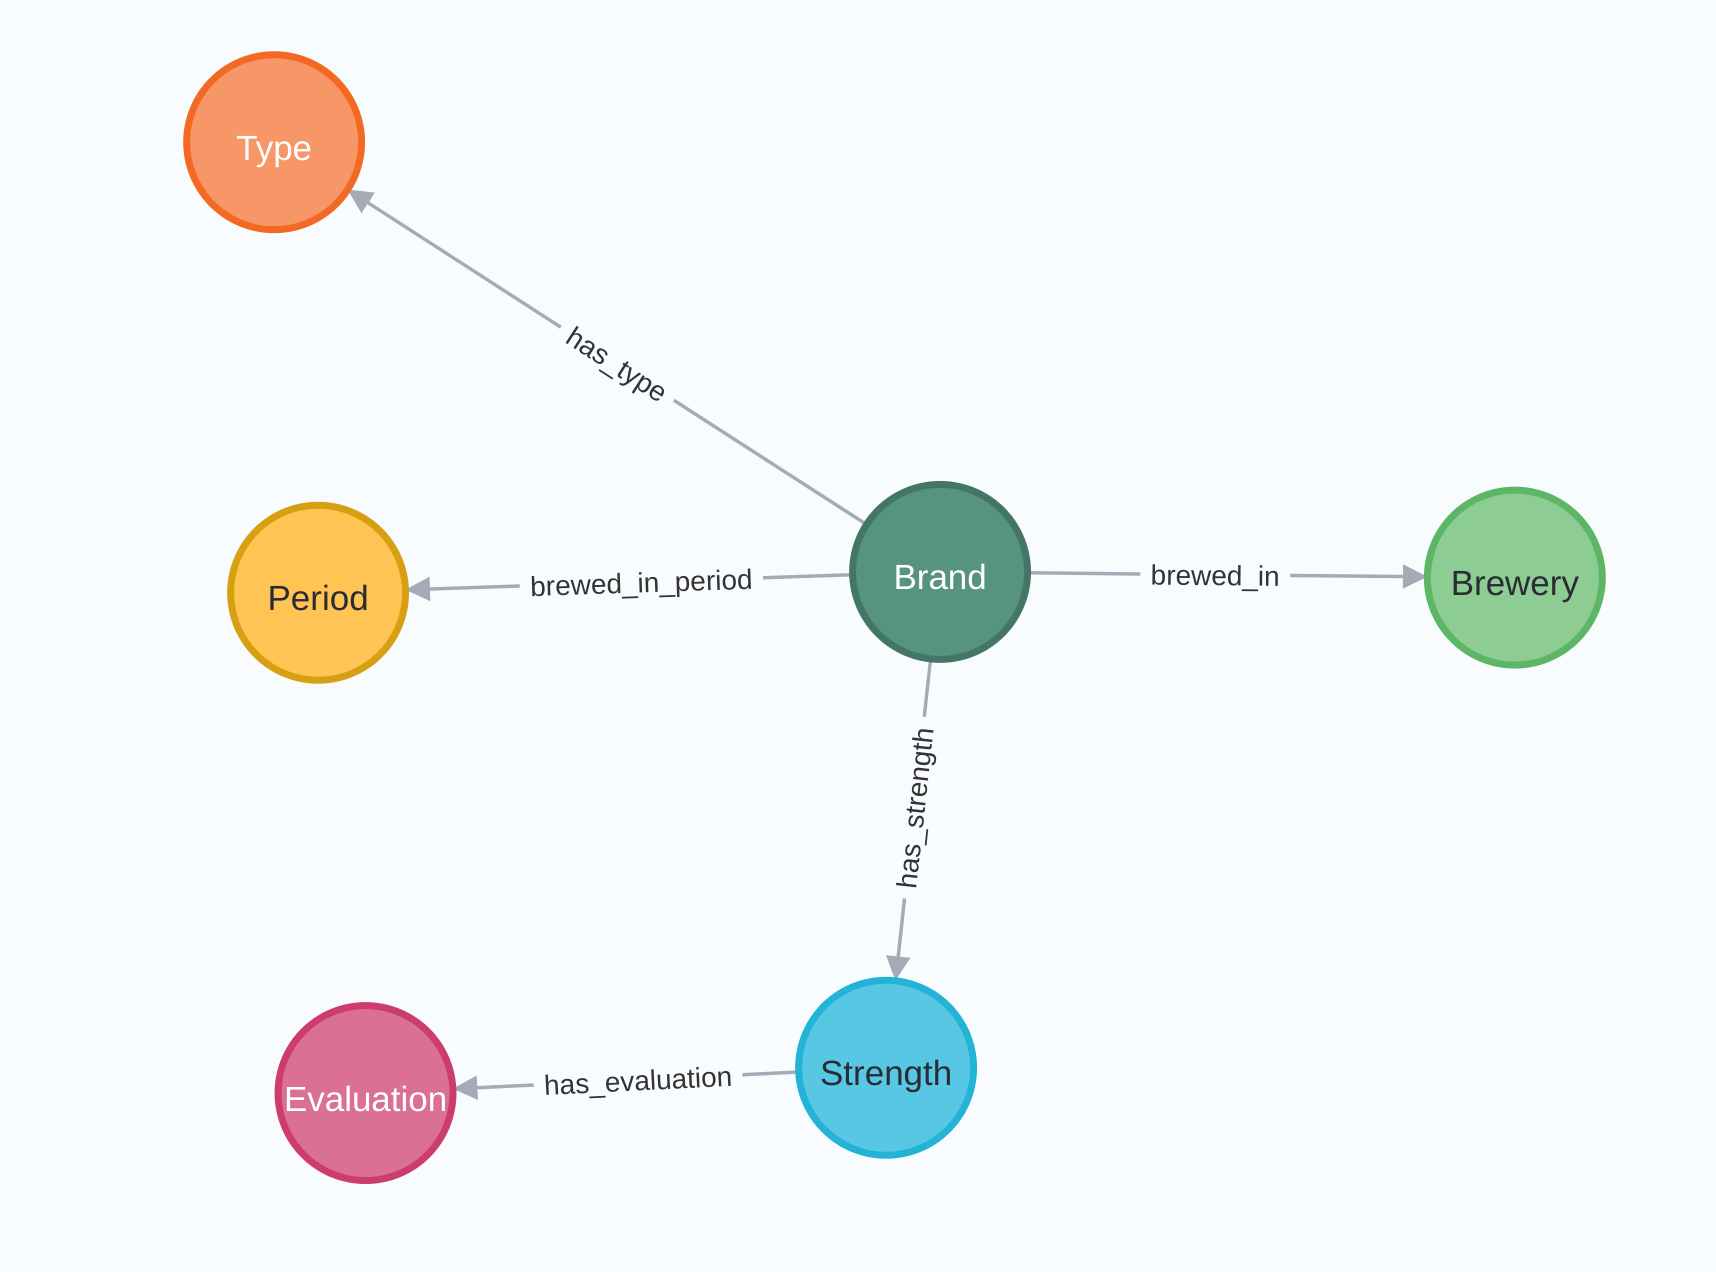

Neo4j is the world's leading graph database management system, designed for optimized fast...
Neo4j is the world's leading graph database management system, designed for optimized fast management, storage, and traversal of nodes and relationships. It is a high-performance graph store with all the features expected of a mature and robust database, like a friendly query language and ACID transactions.
Apache Hop is a data engineering and data orchestration platform. Hop allows data engineers and data developers to visually design workflows and data pipelines to build powerful solutions. No other data engineering platform currently has the integration with Neo4j that Apache Hop offers.
With the following example, you will learn how to read data from a Neo4j database using Hop. If you do not have access to a Neo4j database, you can consult this quick guide of the Neo4j official documentation to run Neo4j desktop locally, or try Neo4j Aura to run Neo4j in the cloud.
As always, the examples here use a Hop project with environment variables to separate code and configuration in your Hop projects.
Step 1: Create a Neo4j connection
The Neo4j connection, specified on a project level, can be reused across multiple (instances of) a transform or other plugin types.
To create a Neo4j Connection click on the New -> Neo4j Connection option or click on the Metadata -> Neo4j Connection option.
The system displays the New Neo4j Connection view with the following fields to be configured.
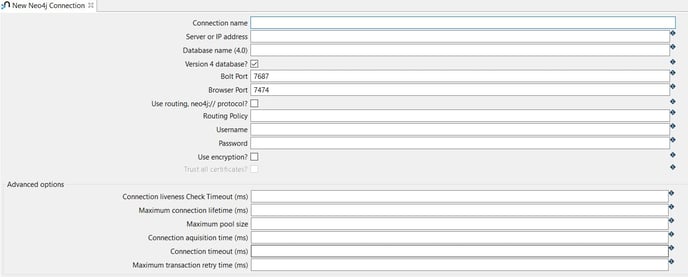
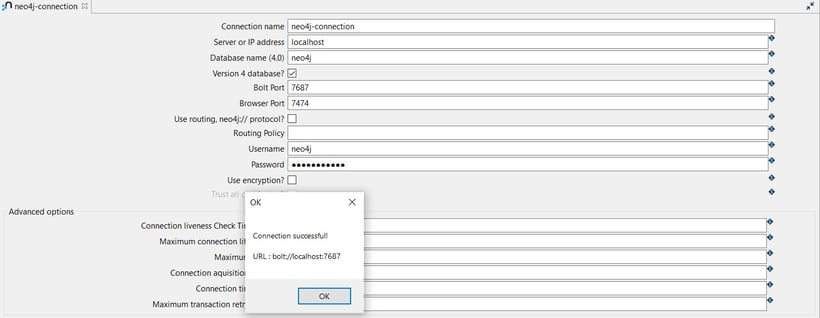
The connection can be configured as in the following example:
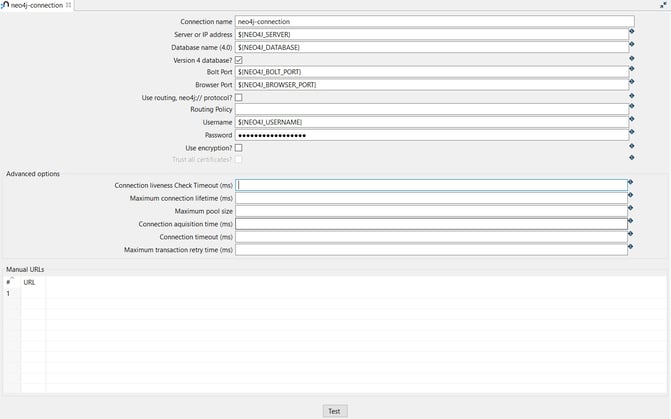
- Connection name: the name of the metadata object (neo4j-connection).
- Server or IP address: the name of the server (${NEO4J_SERVER} = localhost).
- Database name (4.0): the name of the database (${NEO4J_DATABASE} = neo4j).
- Bolt Port: the Bolt port number (${NEO4J_BOLT_PORT} = 7687).
- Browser Port: the Browser port number (${NEO4J_BROWSER_PORT} = 7474)
- Username: specify your username (${NEO4J_USERNAME} = neo4j).
- Password: specify your password (${NEO4J_PASSWORD})
TIP: You can find the variables used to configure the connection in the neo4j-connection.json environment file.
Test the connection by clicking on the Test button.
Step 2: Add and configure the Neo4j Cypher transform
The Neo4j Cypher transform allows you to execute any Cypher through the Neo4j Bolt protocol using the Java driver. Both reading and writing are supported. The cypher queries can be parameterized and call procedures before returning output data.
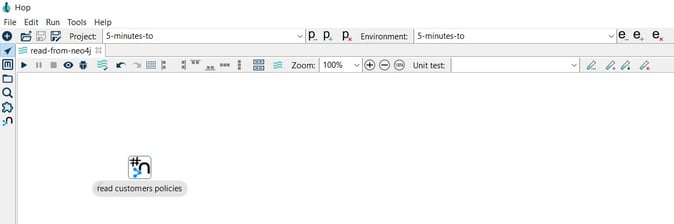
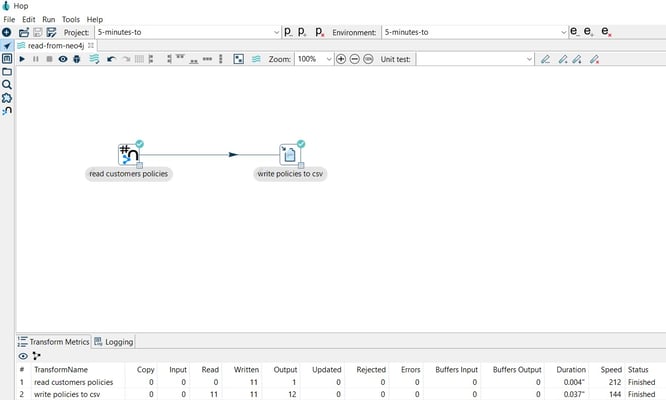
After creating your pipeline (read-from-neo4j.hpl) add a Neo4j Cypher transform. Click anywhere in the pipeline canvas, then Search 'neo4j' -> Neo4j Cypher.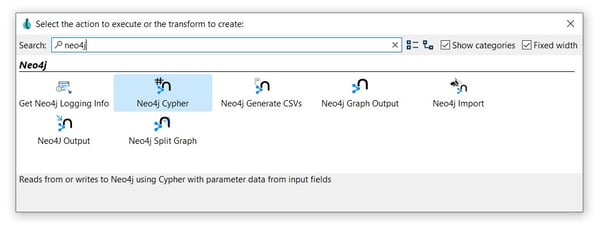
Now it’s time to configure the Neo4j Cypher transform. Open the transform and set your values as in the following example:
Tab: Options
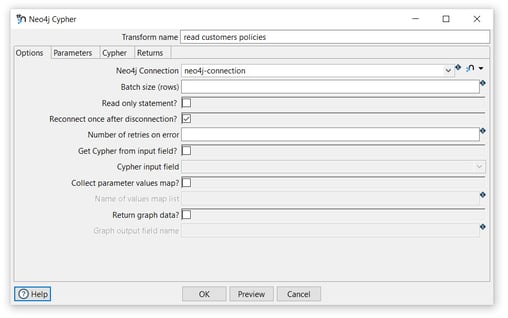
- Transform name: choose a name for your transform, just remember that the name of the transform should be unique in your pipeline (read customers policies).
- Neo4j Connection: select the created connection (neo4j-connection).
Tab: Cypher
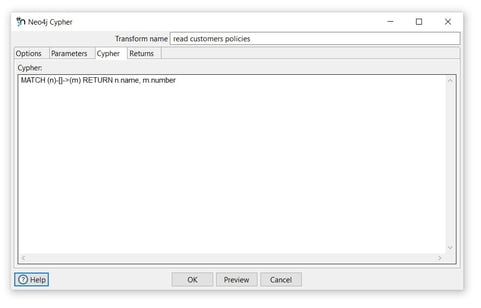
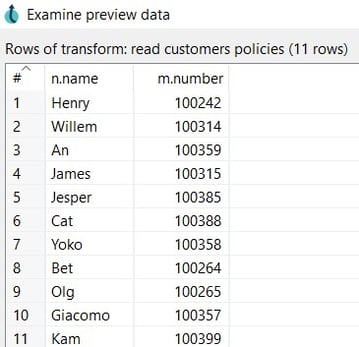
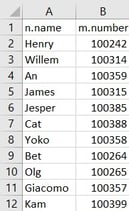
- Cypher: specify the Cypher statement to execute. As a very basic example, we’ll get all the nodes and relationships in the database we wrote to Neo4j in the write to Neo4j page: (MATCH (n)-[]->(m) RETURN n.name, m.number). Your real-life Cypher queries will be more complex, but the process remains unchanged.
Tab: Returns
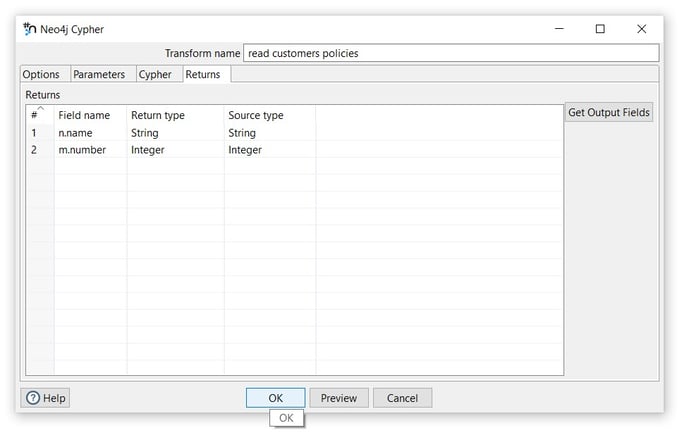
- Click on the Get Output Fields option to add the fields to the Returns table.
To preview the read data click on the Preview button.
- Click on the Close and OK options to save the configuration.
Step 3: Add and configure a Text File Output transform
The Text file output transform is used to export data to text file format. This is commonly used to generate Comma Separated Values (CSV files) that can be read by spreadsheet applications.
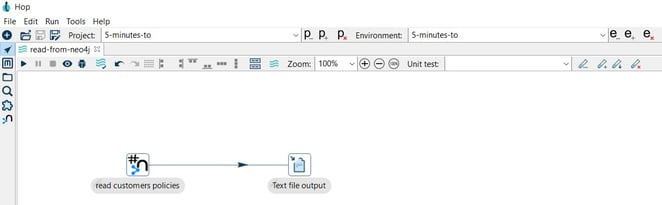
Add a Text File output transform by clicking anywhere in the pipeline canvas, then Search 'text' -> Text File output.
Now it’s time to configure the Text File output transform. Open the transform and set your values as in the following example:
Tab: File
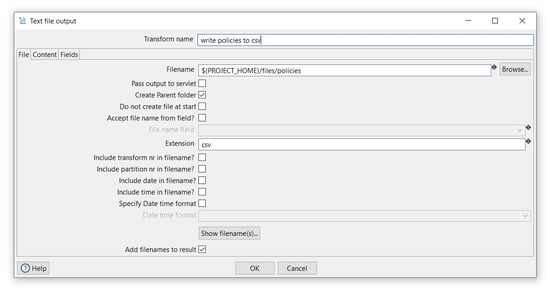
- Transform name: choose a name for your transform, just remember that the name of the transform should be unique in your pipeline (write policies to csv).
- Filename: specify the filename and location of the output text file. You can use the PROJECT_HOME variable and add the folder and file name (${PROJECT_HOME}/files/policies).
- Extension: specify the extension of the filename (csv).
Tab: Fields
- Click on the Get Fields button to get the fields from the preview transform and the OK button to save.
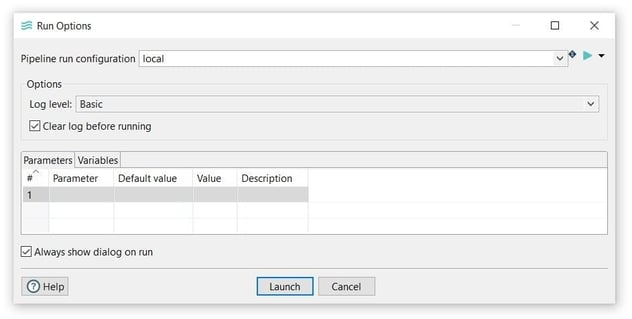
Step 4: Run your pipeline
Finally, run your pipeline by clicking on the Run -> Launch option.
The 'local' run configuration should have been created with your Hop project. If it isn't check the Hop documentation to create a pipeline run configuration.
Open the CSV file to see the read data.
You can find the samples in 5-minutes-to github repository.
Want to find out more? Download our free Hop fact sheet now!


Blog comments